Loading cart contents...
Trezor One Setup Guide
If you’ve just received your Trezor One and are unsure of how to go about setting it up for the first time, this is the guide for you. We’ll take you through the entire setup process from unboxing your device to setting up your security PIN. Let’s get started!
Unboxing
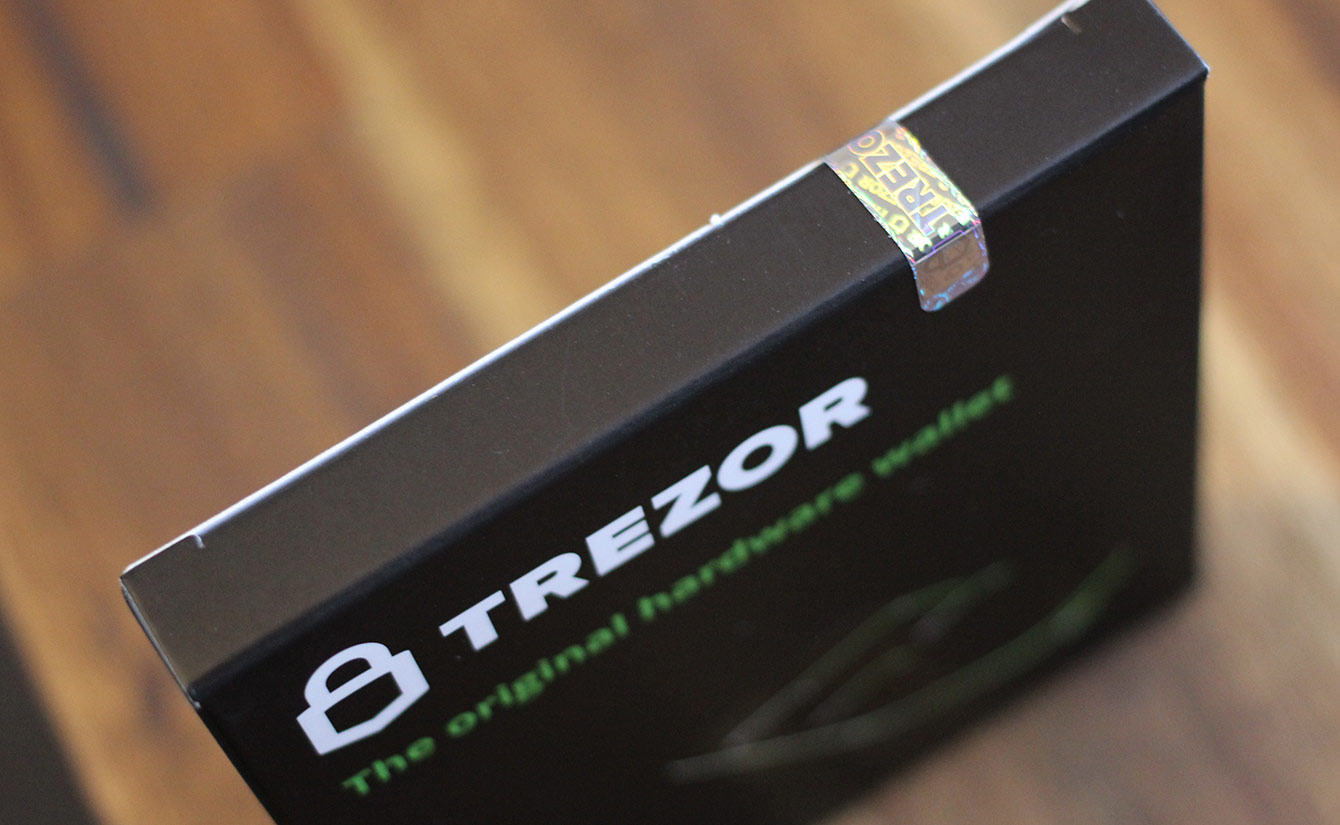
After removing the plastic shrink wrap from your Trezor One device, ensure that the hologram stickers on the outside of the box are intact (as shown above). Take all items out of the box to ensure nothing is missing. Keep in mind when opening the box that it has been deliberately manufactured to be difficult to open to prevent tampering. The box will almost certainly need to be ripped in order to access it’s contents.
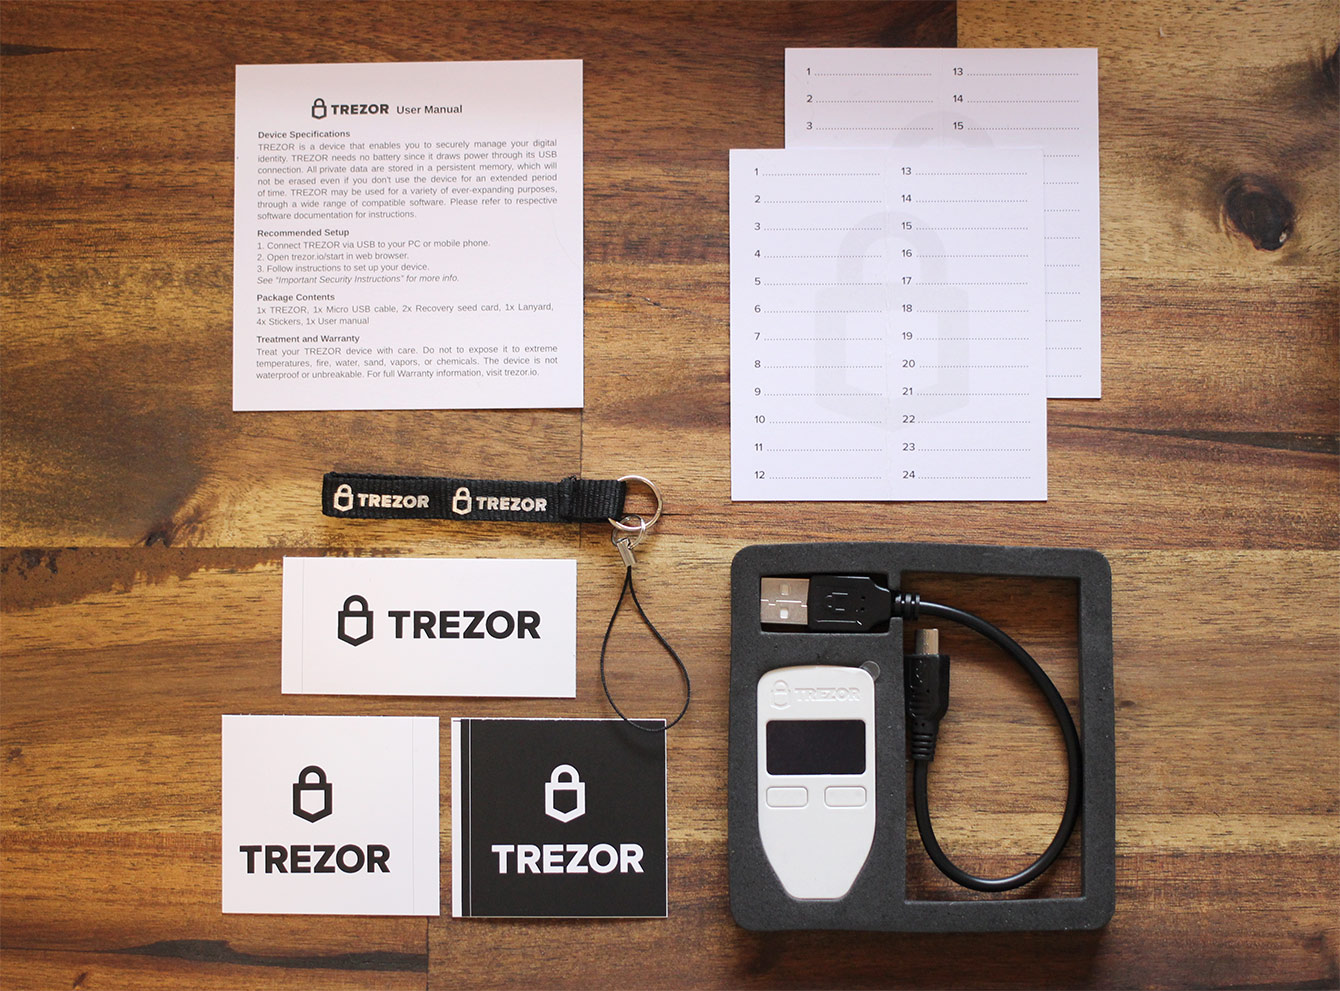
The contents of the box should include:
- Trezor One device
- USB Cable
- 2 x Seed recovery sheets
- User manual sheet
- Trezor Lanyard
- Trezor Stickers
Connect
- Connect the micro-USB end of the accompanying cable into the bottom of the device and plug the other end into a spare USB port on your computer.
- In a web browser (such as Google Chrome or Mozilla Firefox), browse to https://trezor.io/start/
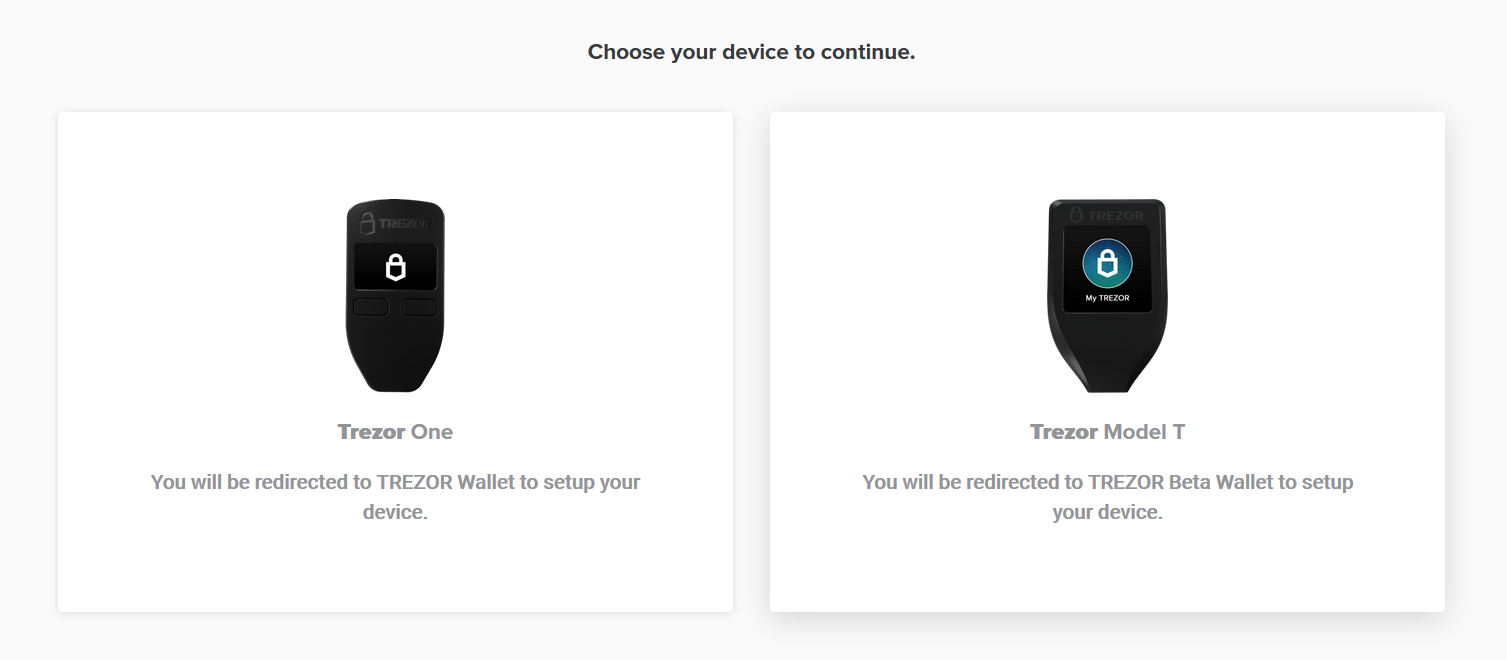
- You will be prompted to select your device type. Click on Trezor One.
- You may have a popup on the screen asking if your Trezor One box’s hologram was intact when you received it. If it was, click Continue to wallet.
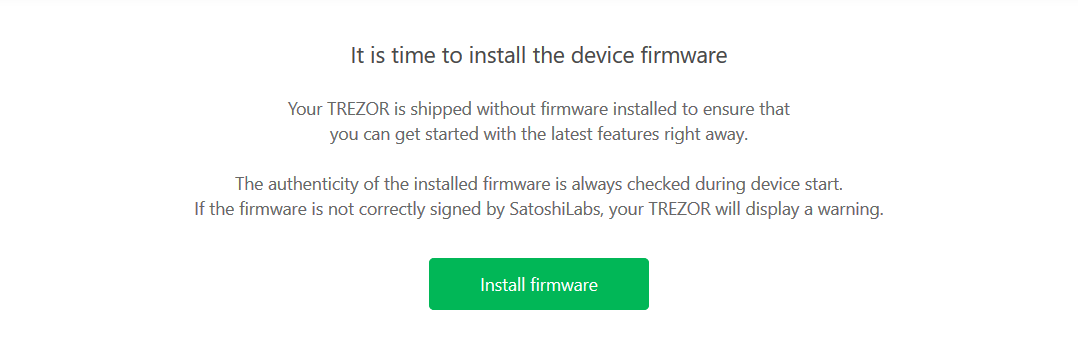
- For security purposes, the Trezor One ships without firmware installed on the device. Click on Install firmware to begin the installation process.
- Follow the prompts to unplug and re-plug the USB cable connected to your device. This may need to be done a couple of times.
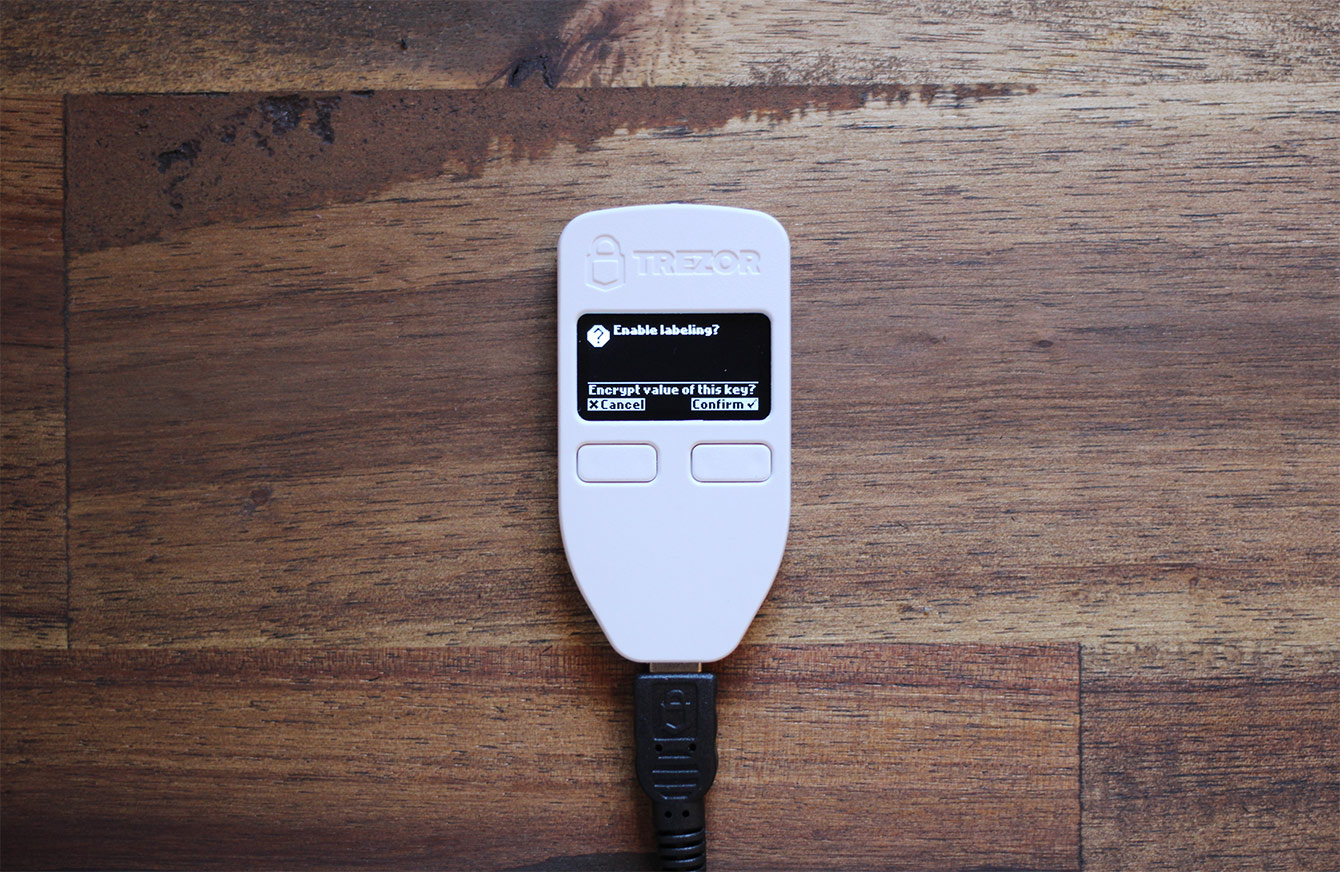
- On the device’s screen, it will ask if you would like to enable labeling. Click the right button to confirm.
Recovery Seed
- Click on Create a backup in 3 minutes.
- Tick I understand and I agree, click Continue.
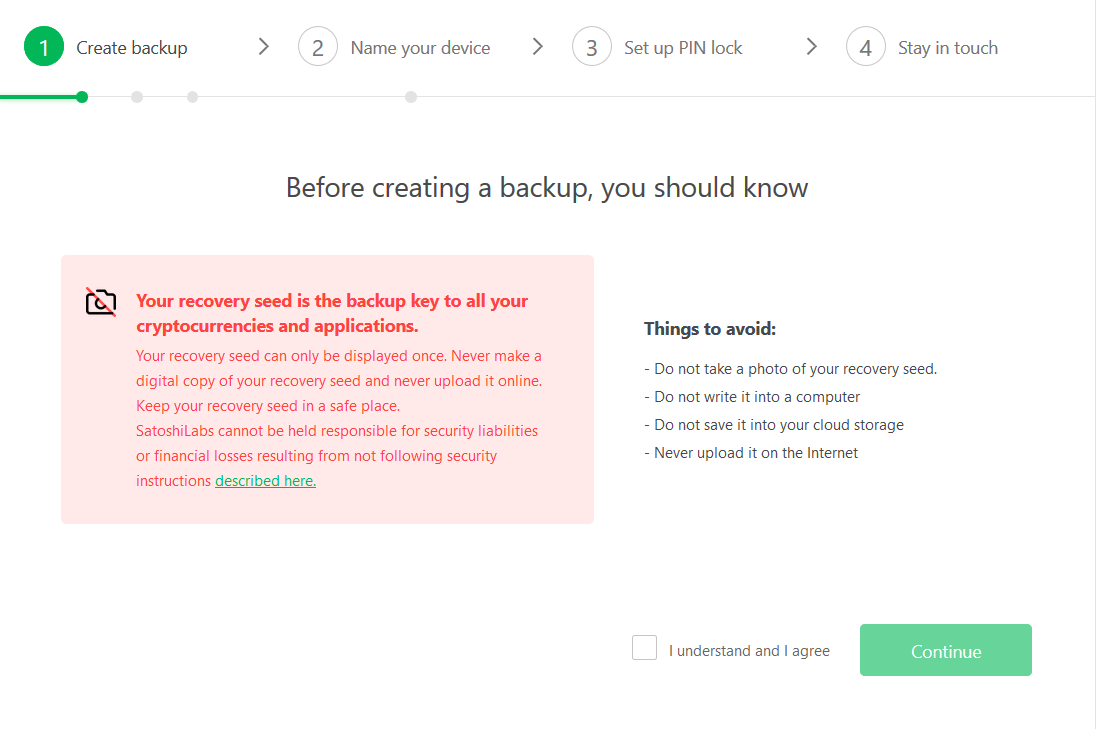
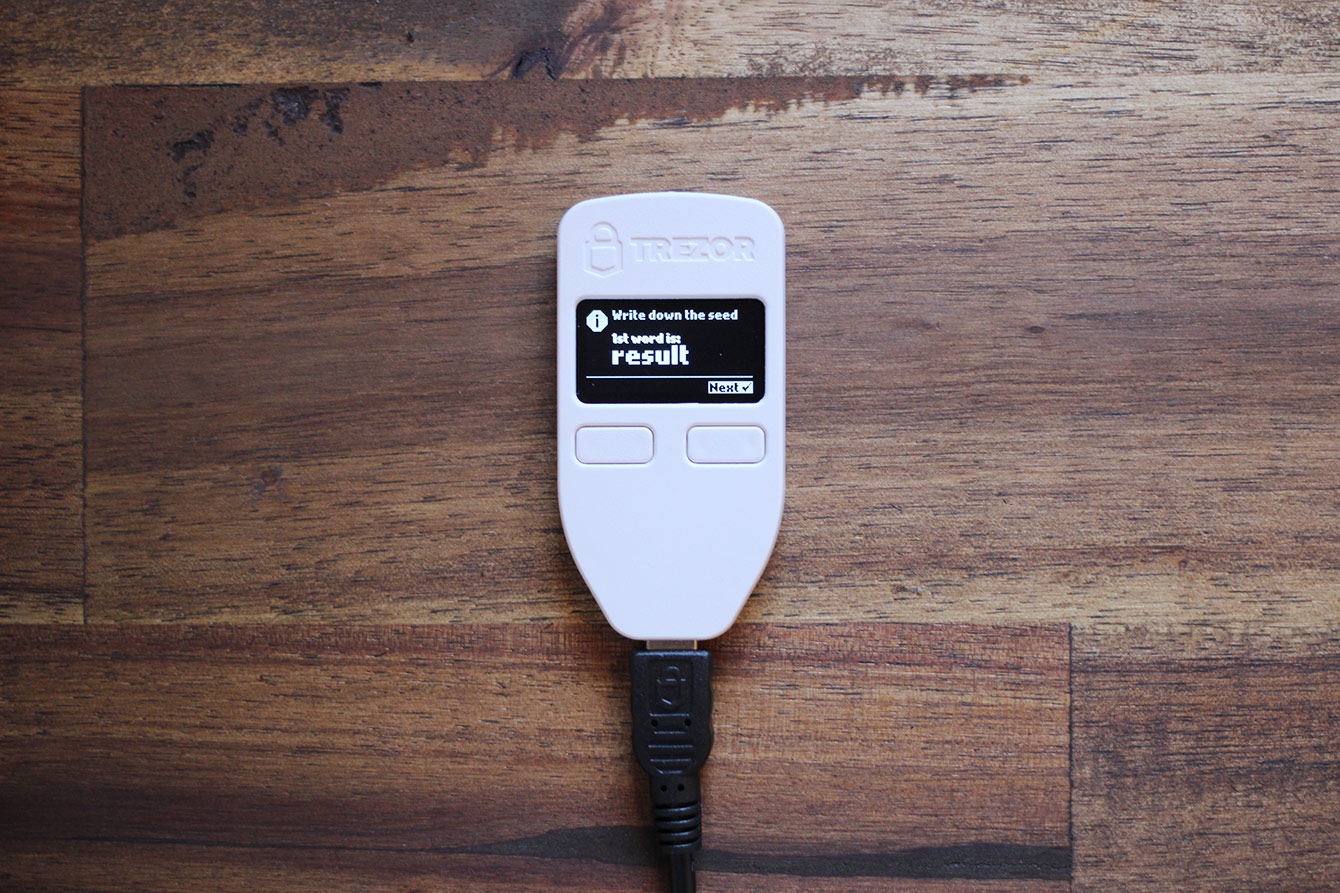
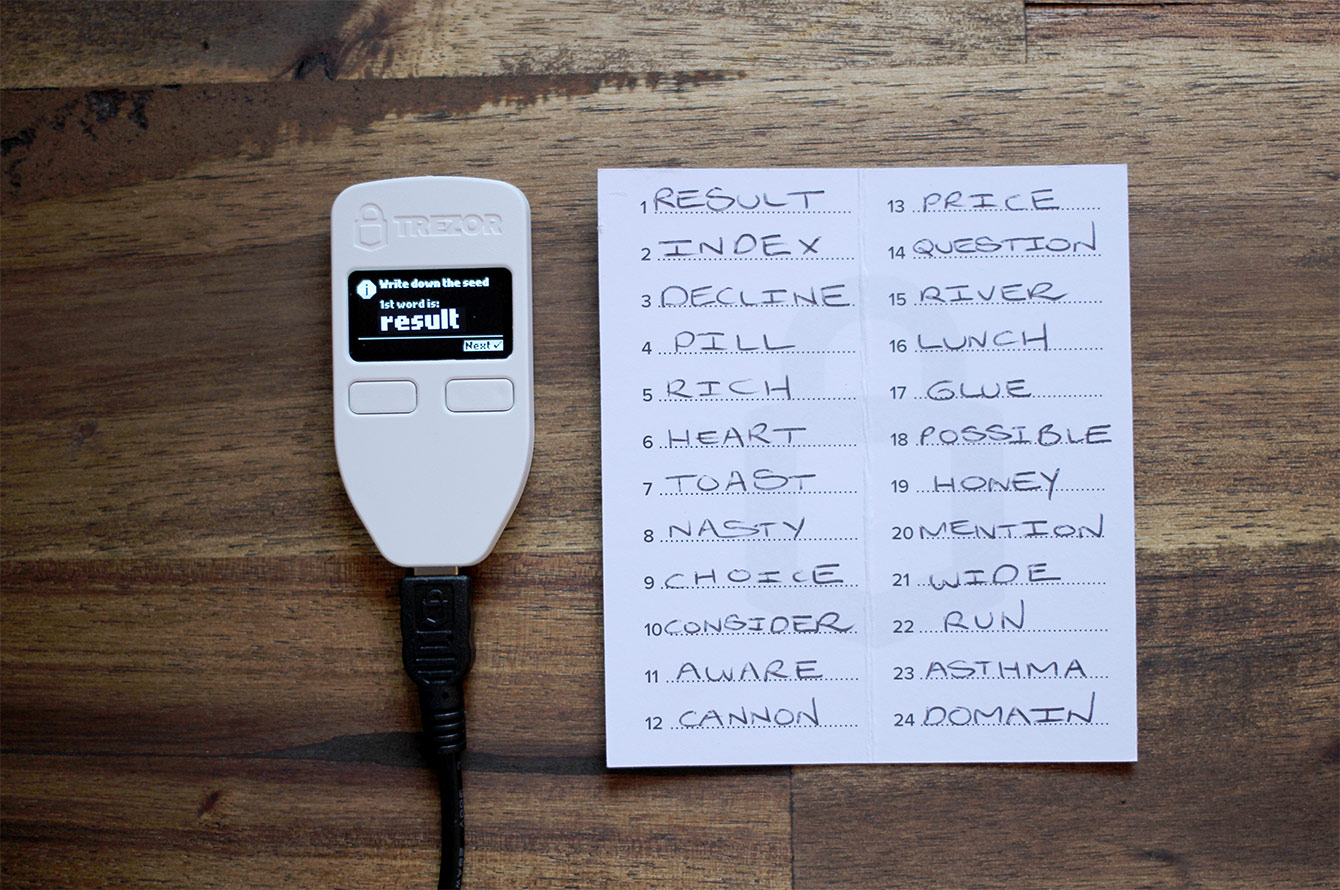
Your 24 word recovery seed will be now be displayed word-by-word on the Trezor One’s screen. These 24 words are required in order to recover your device and it’s coins / tokens should you loose your Trezor. Keep them in a safe and secure place (read more about securely storing your hardware wallet seed).
- Cycle through each of the 24 words using the right button and writing down each word onto the recovery seed paper that came with your device.
- Once you have written down all 24 seed words, the device will ask you to cycle through the words a second time to confirm you have them correctly written down.
- Once you are happy you have your seed words written down correctly, press the right button on your Trezor to finish.
Labeling
- Your device will now need to be labeled. In the text field, type in a name for your device. Choose anything you like such as “Mike’s Trezor” or “My Bank”. We’re going to label ours Bitgear.
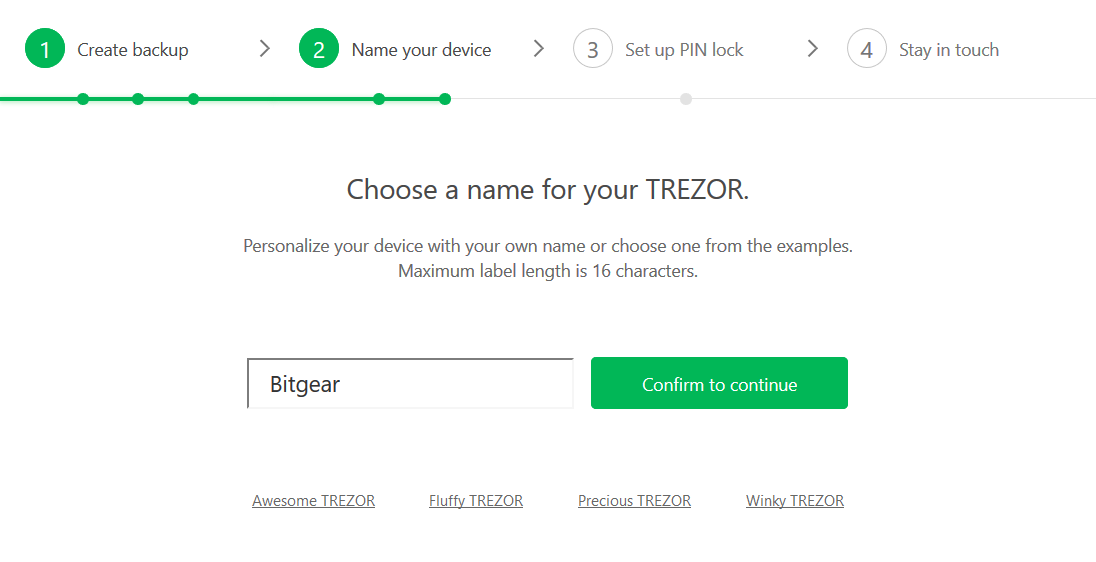
- Once you are happy with your name, click Confirm to continue.
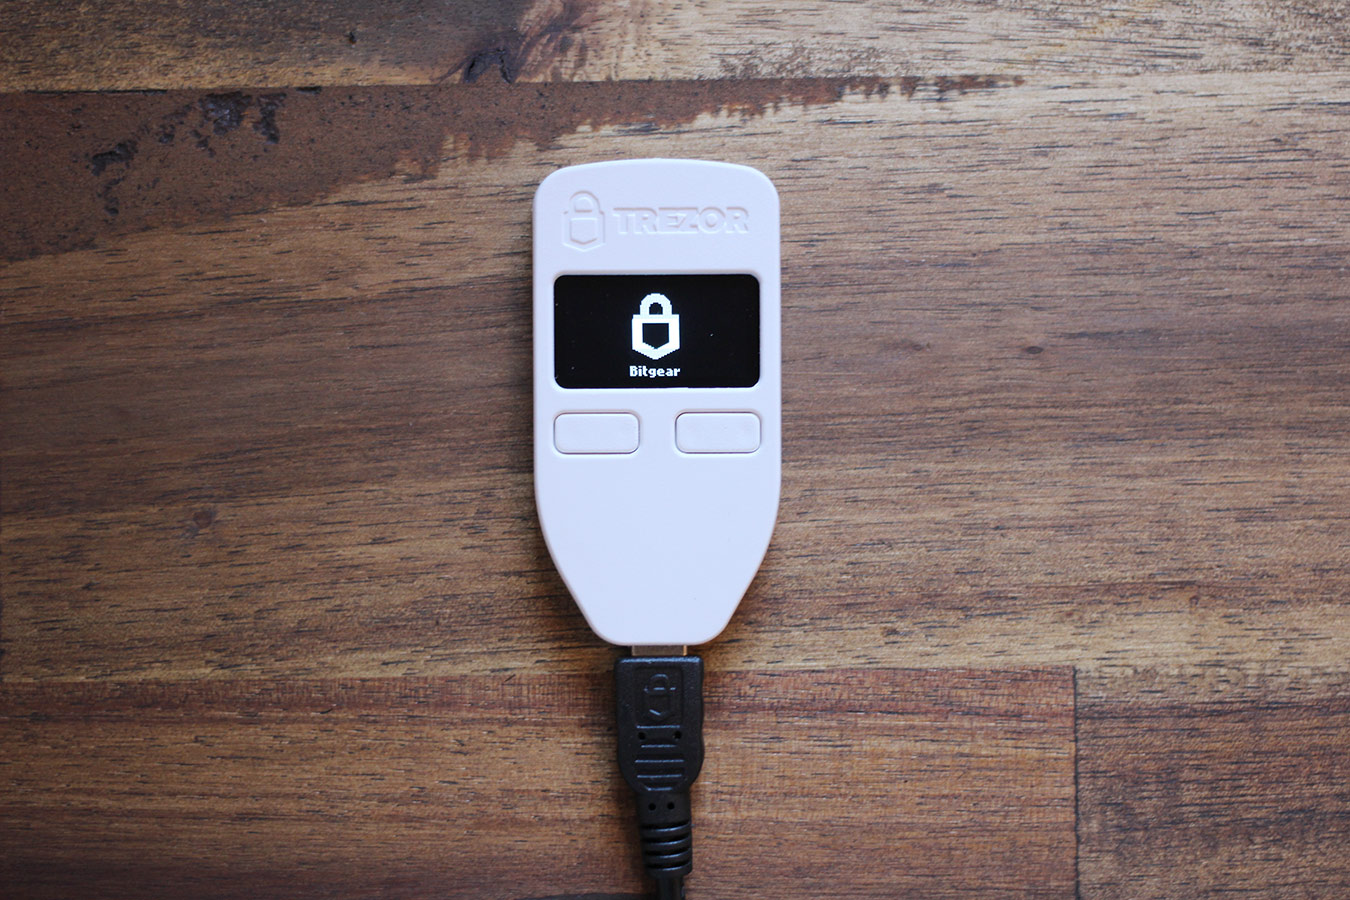
- Confirmation will be required on the Trezor device, press the right button to confirm.
- Click the green Continue button on the computer screen.
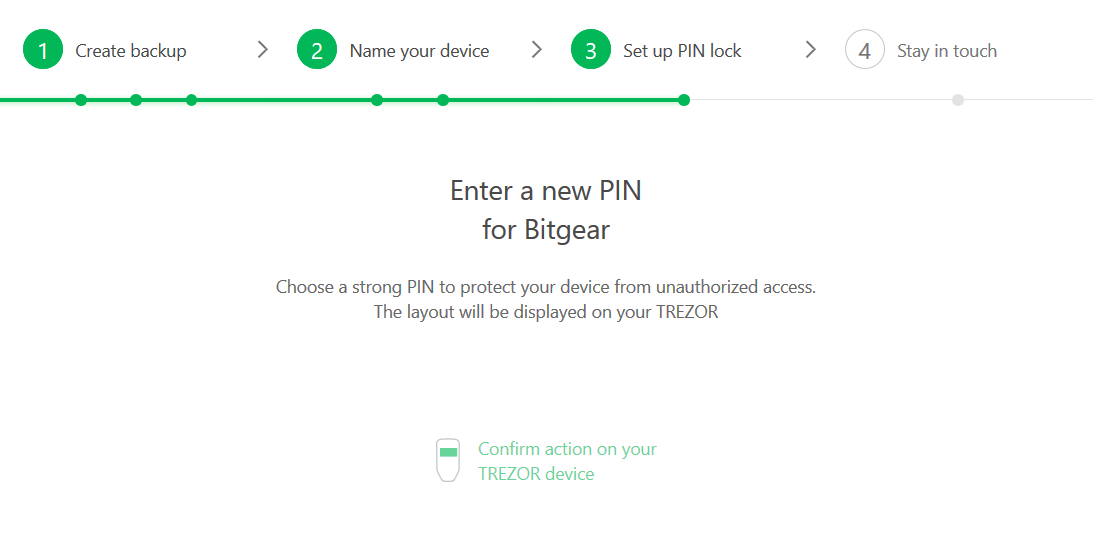
PIN Setup
- You will now need to setup a PIN code for your Trezor One. This PIN code will protect your Trezor and will be required each time you turn on your device. Press the right button to begin the PIN setup.
- Using the numbered grid displayed on your device’s screen, click each of the relating squares on the computer screen to choose your PIN. For example (using the grid shown below) if you wanted your PIN to be 1234, you would click the centre square, top-middle square, top-right square and then middle-right square. Your PIN can be up to 9 digits long.
- Click Enter PIN when you are finished.
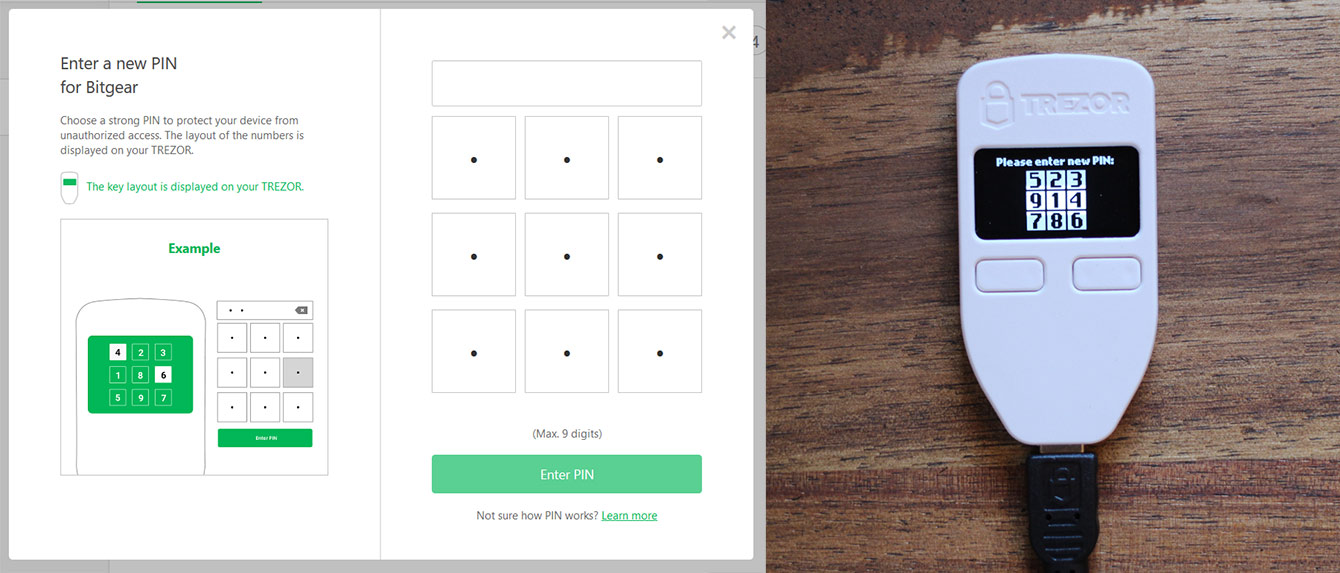
- Now confirm your PIN using the same method and click Enter PIN. Note that the number grid displayed on the device will be different from the last step.
- Finally, click Continue to complete your Trezor One setup.
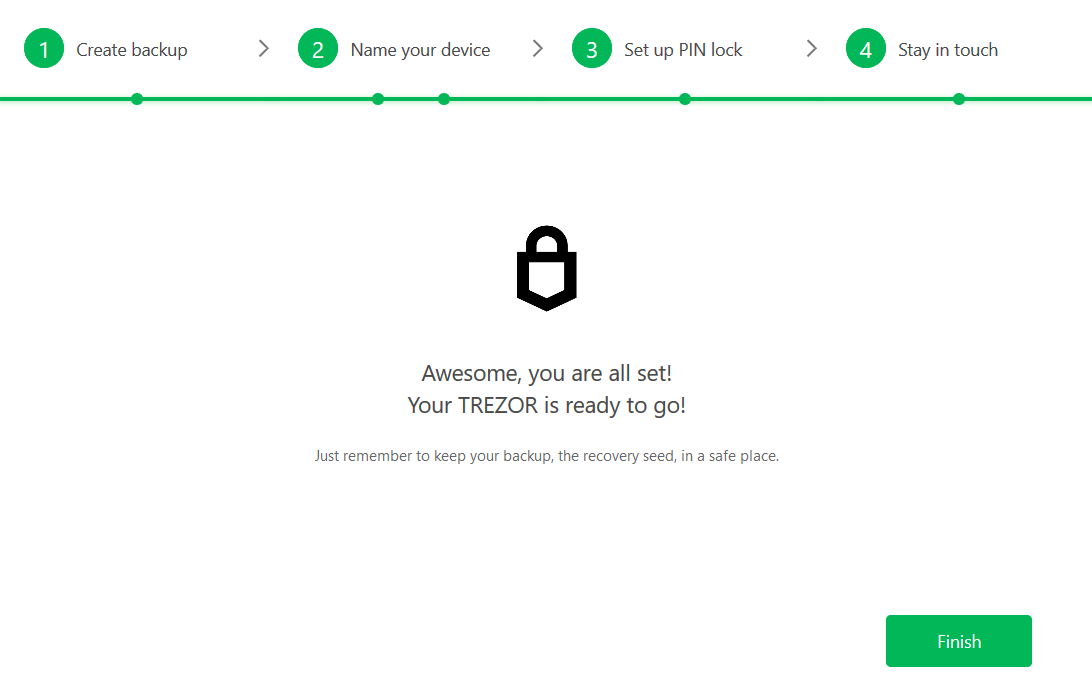
Congratulations! You’ve now setup your brand new Trezor One. You can begin sending funds to your wallets as there are no apps to install and your wallets can always be accessed by visiting https://wallet.trezor.io/ in your web browser.
Ensure that you keep your recovery seed words in a safe place and consider entering them into a Cryptosteel Cassette or Cryptosteel Capsule for safe long term storage.